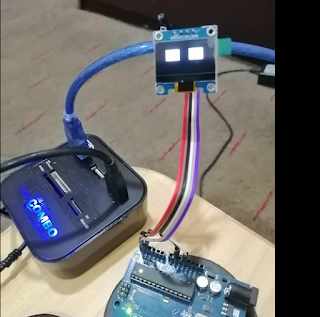
Robot Eyes for robotic projects
How to make robot eyes in a simple way with an OLED display? In this blog, I am going to explain with the help of pictures and the code.
Robotic eyes make your robotic project very interactive. It depends on the specific goals and applications of the project. Robotic eyes with displays offer a wide range of benefits across various robotics projects.
Material Required
1- Arduino Uno 01 No
2- OLED 0.96”(128x64)(with I2C interface ) 01 No
3- Jumper wires 04 No’s
4- Breadboard (Optional ) 01 No
3- Jumper wires 04 No’s
4- Breadboard (Optional ) 01 No
This is a simple project that is part of a robot or robotic project. You can also use an Arduino uno or Nano, for OLED, I used a 0.96” led display. You also need some jumper wires. Connect the wires according to the figure below.
Wiring Connections
Arduino uno OLED display
+5V +5V
- VE - VE
A 4 SDA(Data)
A 5 SCL(Clock)
+5V +5V
- VE - VE
A 4 SDA(Data)
A 5 SCL(Clock)
1. Connect VCC and GND:
Connect the VCC pin of the OLED display to the 5V output on the Arduino.
Connect the GND pin of the OLED display to one of the GND pins on the Arduino.
2. Connect SDA and SCL (I2C Interface):
Find the SDA (data) and SCL (clock) pins on your Arduino board (usually A4 for SDA and A5 for SCL on Arduino Uno).
Connect the SDA pin of the OLED display to the SDA pin on the Arduino.
Connect the SCL pin of the OLED display to the SCL pin on the Arduino.
Upload the Sketch with Arduino IDE
To upload a program in Arduino uno with an Arduino IDE environment. Connect Arduino with USB cable to your laptop and open Arduino IDE.
Select the correct board and port under Tool>Board and Tool>Port in the Arduino IDE. Click the Upload button (right arrow icon) in the Arduino IDE to upload the sketch to your Arduino board.
Installing Libraries
Now you need to add these libraries to arduino ide;
1- SPI.h
2- Wire.h
3- Adafruit_GFX.h
4- Adafruit_SSD1306.h
1- SPI.h
2- Wire.h
3- Adafruit_GFX.h
4- Adafruit_SSD1306.h
1. Open the Arduino IDE on your computer.
2. Go to sketch>Include Library>Manage Libraries.
3. In the Library Manager, search for “Adafruit SSD1306” and install the library by Adafruit. Same steps to be required for other libraries installation.
Every display has its own address , so please make sure the correct address is mentioned in your program. I use 0x3C according to my display.
How It Works?
With an OLED display, animation can be displayed by changing images randomly, giving the impression of movement. You can download images of shapes or faces from different websites, and convert it to byte arrays and use it in your program. I will explain this method in my upcoming article.
The second and easiest method is go to Lopaka app, in the Library area, select your display and generate shape of eyes. This sketch consists of two parts.
Open Eyes
Closed Eyes
Even Though, smiley faces and many more animations can be generated.
Robot Eyes Program
#include <SPI.h>
#include <Wire.h>
#include <Adafruit_GFX.h>
#include <Adafruit_SSD1306.h>
#define SCREEN_WIDTH 128 // OLED display width, in pixels
#define SCREEN_HEIGHT 64 // OLED display height, in pixels
// Declaration for SSD1306 display connected using I2C
#define OLED_RESET -1 // Reset pin # (or -1 if sharing Arduino reset pin)
#define SCREEN_ADDRESS 0x3C
Adafruit_SSD1306 display(SCREEN_WIDTH, SCREEN_HEIGHT, &Wire, OLED_RESET);
#define BLINK_INTERVAL 1000 // Blink interval in milliseconds
// Button pin
#define BUTTON_PIN 2
// States for eye blinking
enum EyeState {
OPEN,
CLOSED
};
EyeState eyeState = OPEN;
unsigned long lastBlinkTime = 500;
void setup() {
Serial.begin(9600);
pinMode(BUTTON_PIN, INPUT_PULLUP);
// Initialize the OLED object
if (!display.begin(SSD1306_SWITCHCAPVCC, SCREEN_ADDRESS)) {
Serial.println(F("SSD1306 allocation failed"));
for (;;); // Don't proceed, loop forever
}
// Clear the buffer.
display.clearDisplay();
display.display();
delay(2000);
}
void loop() {
// Check if it's time to blink the eyes
if (millis() - lastBlinkTime >= BLINK_INTERVAL) {
if (eyeState == OPEN) {
// Close eyes
display.clearDisplay();
display.fillRect(20, 22, 31, 10, WHITE);
display.fillRect(75, 22, 31, 10, WHITE);
display.display();
eyeState = CLOSED;
} else {
// Open eyes
display.clearDisplay();
display.fillRect(20, 14, 31, 24, WHITE);
display.fillRect(75, 14, 31, 24, WHITE);
display.display();
eyeState = OPEN;
}
lastBlinkTime = millis();
}
// Check button press to trigger happy face
if (digitalRead(BUTTON_PIN) == LOW) {
display.clearDisplay();
display.display();
delay(2000); // Display happy face for 2 seconds
// After displaying, clear the display to return to normal
display.clearDisplay();
lastBlinkTime = millis(); // Reset blink timer to maintain blinking pattern
}
}
Testing the Project
Once uploaded, the Arduino will display eye-like graphics or animations on the OLED display. You can customize the code further to add more complex animations, blinking effects, or interactive behavior based on sensor inputs.This basic project serves as a starting point for creating robot eyes using Arduino and an OLED display. Feel free to expand and customize the project based on your creativity and requirements!


